Note: If you're viewing on the support chat widget, we recommend you click the expand icon ![]() on the top right corner, for better viewing experience.
on the top right corner, for better viewing experience.
Introduction
Do you raise similar customer invoices on a weekly, monthly, quarterly or even an annual basis? We know how tedious and time-consuming raising invoices can be from the feedback we've received. With the recurring invoice feature, you can now schedule and automate the creation of these invoices to be sent to customers without further hassle. Simply, follow the simple 2 steps below to get started.
Step 1
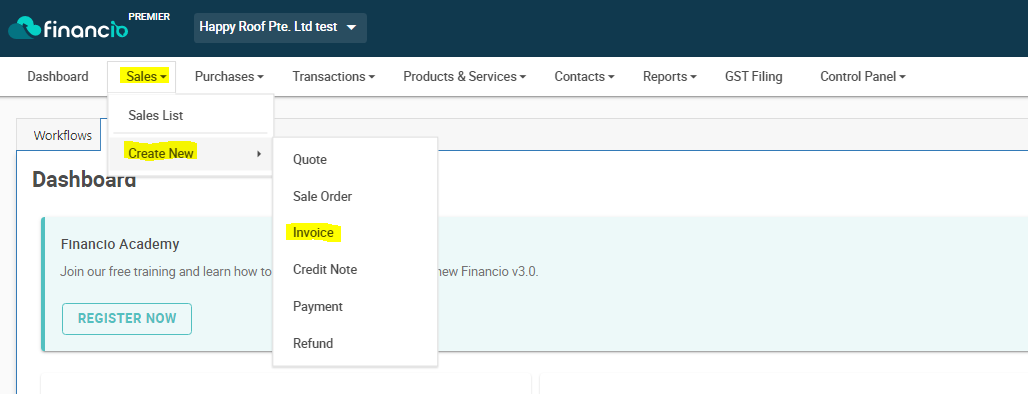
Head over to Sales tab > Create New > Invoice.
Step 2
Switch On the toggle for Recurring Invoice located at the top of the create invoice page.
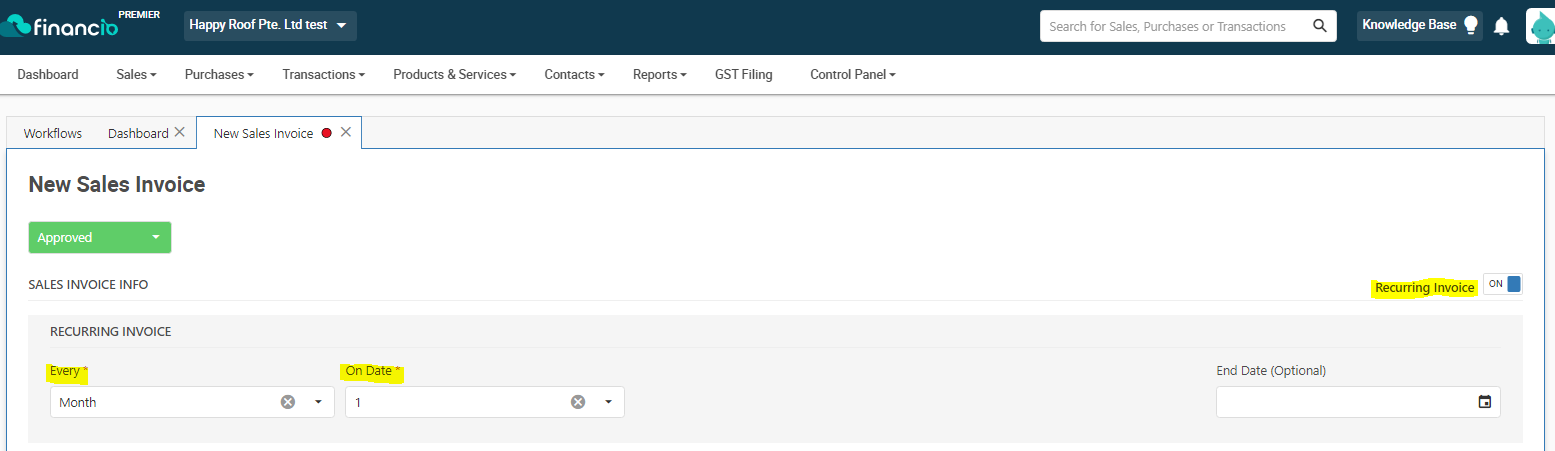
In the Every* drop-down menu, choose between monthly, weekly, yearly, quarterly (every 3 months) or bi-annually (every 6 months)
On Date*: Choose a date between 1 - 28, the invoice will be created and sent out on the selected date.
End Date (Optional): Indicate if you'd like the automation to end after a particular period.
(You may click on the calendar to choose a date or type in the column)
Once set up, go ahead and complete the remaining details of the invoice before hitting the save & approve.
*Important Notes*
- Please make sure you've switched on the e-transaction for your contact and the email address is valid. Otherwise, the e-transaction will not be sent.
- Always make sure that the details filled up in the invoice are relevant for recurring purposes.
- Please make sure the payment term* is correct.
Besides, you also have an option to stop the recurring function if required. Below are the steps:
Step 1
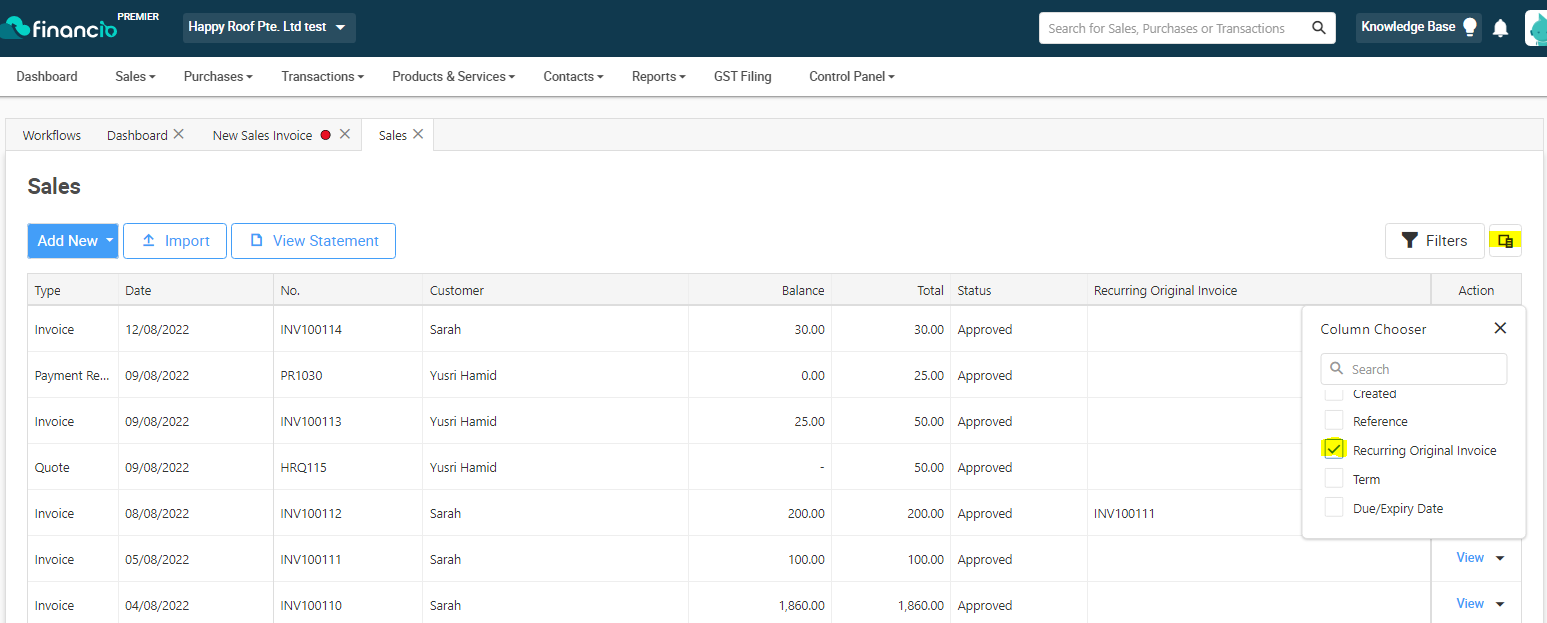
Locate the original invoice to stop the setting, by navigating to Sale Tab > Sales List > Column Chooser > Tick Recurring Original Invoice box.
Step 2
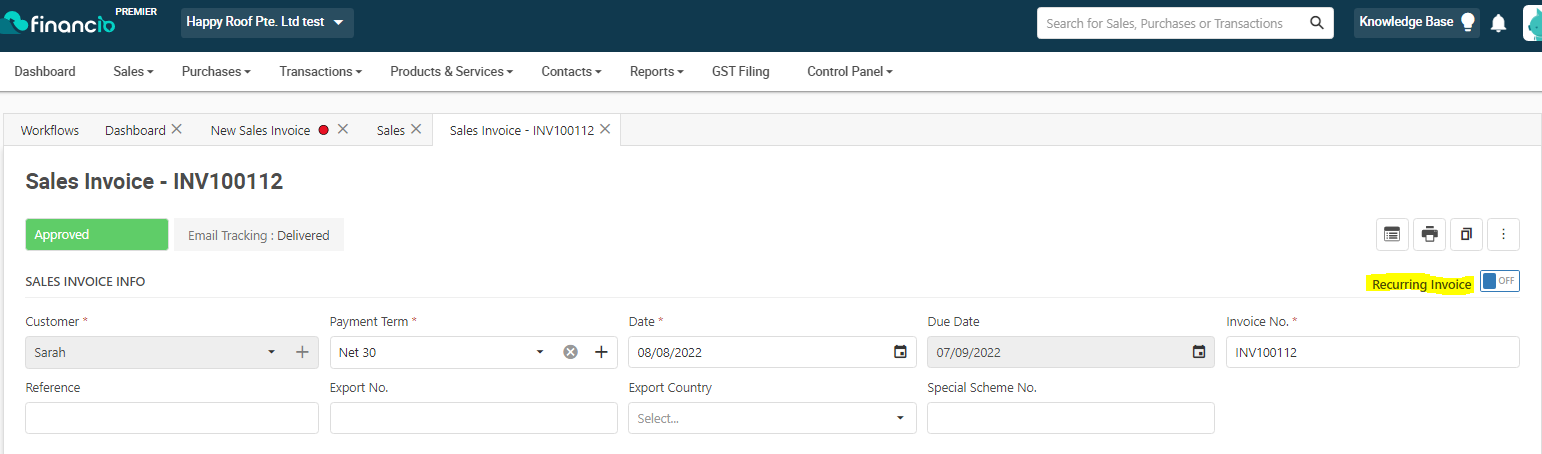
Click View on the original invoice, and Turn- Off the Recurring Invoice toggle> Save.
Comments
0 comments
Article is closed for comments.