
Note: If you're viewing on the support chat widget, we recommend you click the expand icon ![]() on the top right corner, for better viewing experience.
on the top right corner, for better viewing experience.
Auto Build function is only available on Financio Premier.
The inventory Auto Build function enables you to automatically build inventory items consisting of more than one sub-component. By doing this, you will be able to build a finished good by putting together the sub-components needed to produce the finished good. For example, to make a ceiling fan, a manufacturer will have a number of components such as electric motor, blades and stand.
To create your own build-item to inventory on Financio, first you will need specify all the sub-components / raw materials that is needed to produce the finished good.
Firstly, add all the sub-components/ raw materials as a stand-alone product in Financio product list. Please ensure to activate the inventory tracking function for each sub-components / raw material that you have added. Otherwise, you won’t be able to add the materials inside the finished goods build item’s list later.
To add new product (sub-components/ raw materials):
- Navigate to Products & Services
- Click on Add new
- Provide the required product details:
- Turn On ‘I sell this item or service toggle’ and provide selling details
- Turn On ‘I buy this item or service toggle’ and provide buying details
Note: ‘I sell and I buy’ informations are required for costing calculation based on the selected costing method.
- Click Save
Notes: Make sure you have activated the inventory tracking on each item that you add.
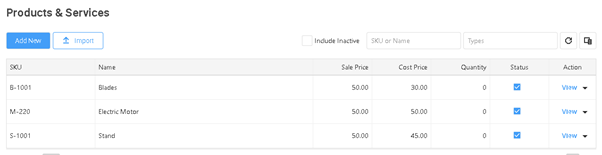
For example, as a ceiling fan manufacturer, I’ve added all the three sub-components (electric motor, blade and stand) in the product & service list.
Now, you can proceed to add the finished good in the product list.
To add new product (finished good):
- Navigate Products & Services
- Click on Add new
- Provide the required product details:
- Turn On ‘I sell this item or service toggle’ and provide selling details
- Turn On ‘I buy this item or service toggle’ and provide buying details
Note: ‘I sell and I buy’ information are required for costing calculation based on the selected costing method.
- Click Save
Note: Make sure you have activated the inventory tracking on the finished good.
In this case, I will create a new product and name it as ceiling fan (the finished good).
Enabling Auto Build function
To enable the auto build function:
- Navigate to the Products & Services tab
- On the finished good that you have created, Click View
- Scroll down and Enable Auto Build function
- Click on Add New to add all the sub-component/ raw materials to this end-product.
Select:
-
- SKU*
- Name*
- Quantity*
- UOM*
- Location Id
- Click Save.
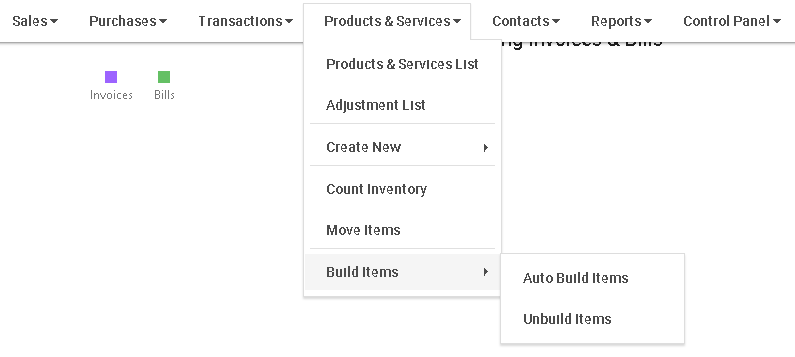
6. Next, on the task bar at the top click on Products & Services > Build Items > Auto Build Items.
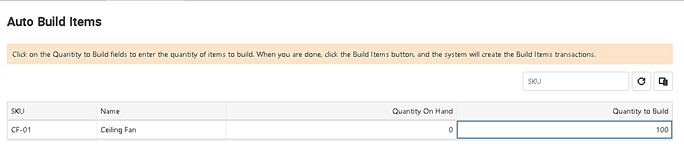
- You will be able to see the items that can be built automatically on the list. Here, you can add the Quantity to Build to create the Build Items transaction on the selected product.
- Click on the Quantity to Build column.
- Add the quantity.
- Once done, click on Build Items button at the bottom.
- Next, you will be able to view the Build Items Summary as in the screenshot below:
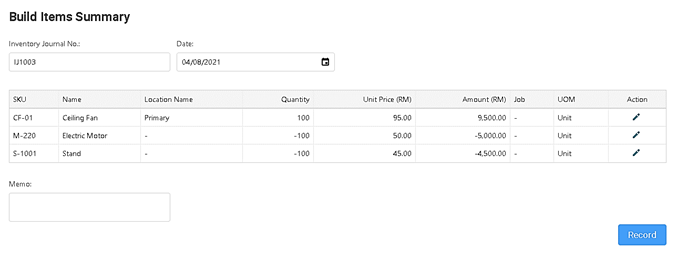
Note: On the summary, system will automatically show the quantity updates for both finished items produced and quantity of sub-components/ raw materials used to produce the quantity to build items earlier. Other than that, you can also view the cost incurred to produce the item (Unit Price, Amount and UOM applied).
Do note, if you are using FIFO as costing method the unit price and amount will only appear after you record and save a transaction.
- Once you have checked the summary, you can click on Record button at the bottom to transfer the information over to the inventory adjustment to update the quantity of the product.
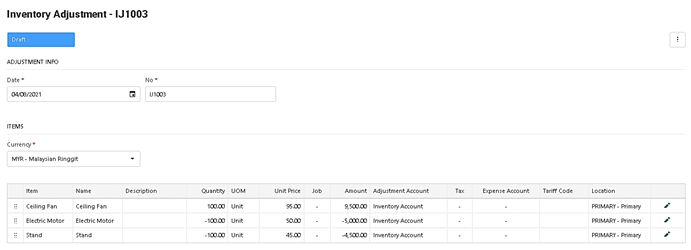
- Click on the Save button at the bottom to save this inventory adjustment as approved transaction.
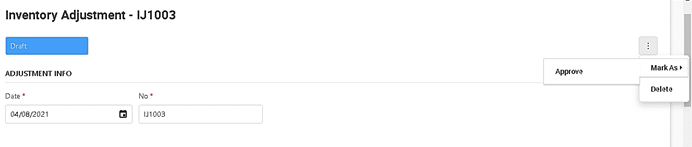
- Alternatively, you can also approve the inventory adjustment by click on the 3 dots icon > Mark As > Approve.
Likewise, you can also Unbuild Items to remove the quantity added on auto build items.
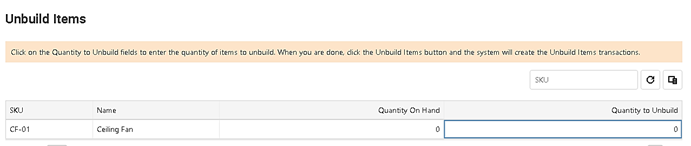
1.Click on Products & Services > Build Items > Unbuild Items.
- You will be able to see the items that can be unbuilt automatically on the list. Then, you can add the Quantity to Unbuild to create the Unbuild Items transaction on the selected product.
- Click on the Quantity to Unbuild column.
- Add the quantity.
- Once done, click on Unbuild Items button at the bottom.
- Next, you can proceed to check the unbuild item summary and proceed to record the inventory adjustment accordingly.
Remove one or more items from the Auto Build Items (sub-components/ raw materials)
- Click View on the item (the finished good)
- Scroll down to Auto Build section at the bottom.
- Click on the delete button to remove the item from the item list.
- Click Save

Comments
0 comments
Article is closed for comments.